Install & set up playR
Everything is explained step by step — even if you are a complete beginner.
The basics
playR = one server (which hosts the library) + clients (the PCs that connect to it).
- The server runs on a Windows PC, or elsewhere through Docker (NAS, CasaOS, Proxmox…).
- The client (the Windows app) finds it on its own, on this PC or across the network.
- You connect your accounts (Steam, Epic…) and sync.
You need just one server on your network; all your client PCs point to it.
Server — on a Windows PC
Nothing to do: the installer installs the server at the same time as the application. On first launch, playR starts it and connects to it on its own.
- A small playR Serveur window opens and shows the address to give to your other PCs.
- Closing the window minimizes it to the system tray (next to the clock) — the server keeps running.
- To stop it: right-click the icon → Stop.
Server — on CasaOS
- App Store → Install a custom app.
- Click the Import icon, at the top right of the window.
- Copy the contents of this file, paste them, then Submit.
- Click Install.
- In the window that opens: Install, then Open.
Address to give your clients: http://[IP-du-CasaOS]:3000.
Server — on Synology / NAS
Docker is only available on supported Synology models (mostly Intel/x86 — the “+” series and mid to high-end ones). On many ARM / entry-level, the app does not show up at all in Package Center, whatever the DSM version. In that case, host the server elsewhere: a PC running the Windows “Server” app, a mini-PC, a Raspberry Pi…
To check: list of Container Manager compatible models.
The case of ARM Synology models (e.g. DS218 — RTD1296 chip): Synology does NOT offer Docker / Container Manager for these models in Package Center. A community workaround does exist (the 007revad “ContainerManager for all armv8” script, DSM 7.2+) that installs Container Manager on these models — unofficial, at your own risk.
⚠️ On top of that, the playR image is currently amd64 only and arm64 support (ARM NAS, Raspberry Pi) is on the way. In the meantime, on these machines, the simplest option is to host the server elsewhere (mini-PC, CasaOS, or the Windows “Server” app).
The name of the app depends on your DSM version:
- DSM 7.2 / 7.3 → « Container Manager »
- DSM 7.0 / 7.1 → « Docker »
If the app is available in Package Center, install it, open it, then:
- Project → Create.
- Name:
playr· path: a folder (e.g./docker/playr). - Source: Create docker-compose.yml, and paste:
services:
  playr:
    image: ghcr.io/ixelia-fr/playr:latest
    container_name: playr
    restart: unless-stopped
    ports:
      - "3000:3000"
    environment:
      - NODE_ENV=production
      - DATA_PATH=/app/data
    volumes:
- /volume1/docker/playr/data:/app/data- Next → Finish. Container Manager downloads the image and starts it.
- Address for your clients:
http://[IP-du-Synology]:3000.
Server — on Proxmox
Two options:
- An LXC container with Docker installed, then the generic Docker command.
- A small VM (Debian/Ubuntu) with Docker, same thing.
Server — Docker (the universal method)
The server is a Docker image: it runs on any Docker host (a plain Linux server, a mini-PC, an Intel/amd64 Raspberry Pi…). It is the basis for every other case.
mkdir -p ./playr/data
docker run -d --name playr --restart unless-stopped \
  -p 3000:3000 \
  -e DATA_PATH=/app/data \
  -v $(pwd)/playr/data:/app/data \
  ghcr.io/ixelia-fr/playr:latest
Or with a docker-compose.yml then docker compose up -d.
Server — Portainer, Unraid, TrueNAS, OMV…
All these platforms run Docker → so it is the same compose file everywhere. Landmarks tool by tool:
- Portainer / Dockge: Stacks → Add stack → paste the compose file → Deploy.
- Unraid: the Compose Manager plugin (or a Docker template) — image
ghcr.io/ixelia-fr/playr:latest, port 3000, volume mapped to/app/data. - TrueNAS SCALE: Apps → Custom App / Docker Compose — same image, same port, same volume.
- OpenMediaVault: the compose plugin (omv-extras) → paste the compose file.
In every case: image ghcr.io/ixelia-fr/playr:latest, port 3000, persistent volume on /app/data. Address for your clients: http://[IP-de-la-machine]:3000.
Approve a device
Your server does not open its library to just anyone: each device has to be approved once — after that it remembers. Nobody else on your network can read your backups or drive playR.
- The first device: nothing to type. On a brand-new server, the first device that shows up becomes its owner — open playR right after installing.
- The next devices: the new device shows a 2-digit code. On a device that is already approved, a notification appears (and a controller prompt in TV Mode): check that the code shown is the same, then Authorize. One click, nothing to copy out.
- Server on this PC (standard Windows install): nothing to do either. playR finds the code on disk by itself and approves itself without asking you anything.
See and revoke devices
In playR: Settings → Devices. There you find the approved devices and when each was last seen; you can rename them or revoke them. A lost phone can be revoked on its own, without touching the other devices.
As a fallback: the authorization code
It is useful in two cases: you have no approved device at hand (all lost or revoked), or someone else claimed your server before you on the very first startup. On the pairing screen, click J'ai un code d'autorisation.
- Windows server: in the playR Serveur window, in the Authorization code block, with a button labeled Copy the code.
- Docker / NAS server: there is no screen over there, so the code is written to the logs on startup:
Look for the linedocker compose logs playrplayR — code d'autorisation : XXXX-XXXX-XXXX.
Updating the server
Windows server
Nothing to do. It updates itself, at the same time as the app.
Docker server (NAS, CasaOS, Proxmox…)
Automatic (included by default). The docker-compose.yml shipped with playR embeds a playr-updater service that checks every 30 minutes and updates playR all by itself. Nothing to configure, nothing to type. It only touches the playR container.
Manually (fallback). A notification (🔔 top right) tells you when a new version is out. If you would rather trigger it yourself, or if you installed the image on its own (without the compose file), run this on the host machine — the command asks Docker for its path, so you do not need to be in the right folder:
cd "$(docker inspect playr --format '{{index .Config.Labels "com.docker.compose.project.working_dir"}}')" && docker compose pull && docker compose up -dInstall the client
Download the installer and run it. On first launch, playR looks for your library — on this PC as well as across the network — and asks you to confirm it. You can switch servers at any time (⚙ menu → Change server).
Connect your accounts
Every server starts out empty: you connect your own accounts in ⚙ Settings. Nothing is shared.
For most platforms, playR simply opens an official sign-in window: you identify yourself on their site, as usual, and that is it. No more codes to copy over.
| Service | What you need | |
|---|---|---|
| Steam | Steam username + password, then Steam Guard (family included) — or SteamID + API key | More info → |
| Epic | An Epic sign-in window | More info → |
| GOG | The URL of your public profile | More info → |
| Amazon | A button (the Amazon Games app must be installed on this PC) | More info → |
| EA | An EA sign-in window | More info → |
| Ubisoft Connect | A Ubisoft sign-in window (two-factor authentication included) | More info → |
| Battle.net | A Battle.net sign-in window | More info → |
| GeForce NOW · Amazon Luna | A switch / your subscription tier | More info → |
| Cover art & metadata | Nothing — it is included | More info → |
Steam
Two ways, take your pick:
- Method 1 — Steam Connector (recommended): your Steam credentials in ⚙ Settings → Steam, and that's it. Includes family games and works with a private profile.
- Method 2 — SteamID + API key: only the games you own, without the family ones. Two things to fetch, below.
If several Steam accounts have already been used on this PC, playR spots them and offers them in one click.
Finding your SteamID64
It is not your nickname, but a 17-digit number starting with 7656.
On steamid.io, paste your profile address — not your nickname:
https://steamcommunity.com/id/VOTRE-PSEUDO/Click lookup: the steamID64 line gives you the number.
You can read that address in Steam: your name at the top, then Profile. If it already looks like https://steamcommunity.com/profiles/7656…, the 17 digits are right there.
Getting your API key
On steamcommunity.com/dev/apikey, while signed in to your account:
- Domain Name:
http://localhost:3000 - Tick "I agree to the Steam Web API Terms of Use", otherwise the button does nothing.
- Click Register: the key appears, 32 characters, ready to copy.
The SteamID64 and the key go into ⚙ Settings → Steam.
Epic Games
The normal method — the sign-in window
- ⚙ Settings → Epic → button “Sign in through a window”.
- An Epic sign-in window opens: identify yourself as usual.
- That is all — playR picks up the authorization on its own and closes the window. One sign-in, nothing to copy.
If the window does not open — the code by hand
The old method still works and is still available in the application, behind the link “Trouble? Enter a code manually”:
- Button “Open Epic (get the code)”.
- Sign in to Epic if needed: a plain text page appears.
- Copy the value of the
authorizationCodefield (a long string of characters). - Paste it into playR and click Confirm.
The result is the same either way: it is the server that keeps the access and then resyncs all by itself.
GOG
GOG est le seul à ne proposer aucune connexion de compte: il n'existe pas de bouton « se connecter avec GOG ». playR lit donc votre public profile, exactement comme le ferait un visiteur. C'est un peu plus long à mettre en place, une seule fois.
Rendre son profil public
- On gog.com, cliquez sur votre avatar en haut à droite, puis sur Commandes et paramètres.
- Dans Confidentialité, passez votre profil et vos jeux sur Public.
Récupérer l'adresse de son onglet JEUX
- Cliquez de nouveau sur votre avatar, puis sur Votre profil.
- Sur la page qui s'ouvre, cliquez sur l'onglet GAMES (à côté de Fil d'actualité, Profil, Amis, Avis).
- Copiez l'adresse affichée par le navigateur: elle ressemble à
https://www.gog.com/u/VOTRE-PSEUDO/games. - Collez-la dans ⚙ Paramètres → GOG, puis cliquez Synchroniser GOG.
Amazon Games
Amazon hands out no simple token: its library is encrypted with your Windows session, so it can only be read on your PC. playR takes care of it all by itself.
- Install the Amazon Games app and open it at least once, signed in to your account.
- In playR: ⚙ Settings → Amazon → “Fetch my Amazon library”.
Your Amazon games show up. To be done from the PC where Amazon Games is installed.
EA
- ⚙ Settings → EA → button “Sign in through a window”.
- Identify yourself on the EA page that opens.
- playR picks up the authorization and syncs your EA library — every game you own, not just the ones installed on this PC.
Installed EA games launch and install from playR, like all the others.
Ubisoft Connect
- ⚙ Settings → Ubisoft → button “Sign in with the Ubisoft window”.
- Identify yourself on the Ubisoft page. Two-factor authentication works: Ubisoft is the one showing it, playR only displays its window.
playR never sees your password — only the session token is kept. The library fetched is the one on your account, including games that are not installed.
Battle.net
Two separate buttons, depending on what you want:
- “Connect my Blizzard library”: opens a Battle.net sign-in window and fetches the games you own, installed or not.
- “Detect installed Blizzard games”: simply looks at what is installed on this PC, with no sign-in.
Cloud gaming — GeForce NOW & Amazon Luna
playR can spot the games you are able to play by streaming, without installing them. It is all set up in ⚙ Settings → Cloud Gaming.
GeForce NOW
A single switch: “I have a GeForce NOW subscription”. GeForce NOW adds no games at all to your library — it flags the ones you already own that can be played by streaming.
- A GeForce NOW entry shows up in the sidebar, with the number of games involved.
- On a game page: the “Play via GeForce NOW” button. On a PC where the GeForce NOW application is installed, the game starts straight in it, and playR comes back to the foreground when the session ends.
- In TV Mode, a GeForce NOW tab is added as soon as there are games to show there.
Amazon Luna
Here you pick your subscription tier: Not subscribed, Amazon Prime or Premium. Unlike GeForce NOW, Luna is a real platform: the games it includes are added to your library, a bit like Steam family sharing.
- Amazon Prime gives you the catalog included with Prime; Premium adds the games reserved for the Luna subscription.
- Switching back to Not subscribed removes Luna games from the library.
- Button “Play on Luna” on the game page, and a dedicated tab in TV Mode.
Cover art & metadata
Nothing to configure. Cover art, descriptions, critic scores, times to beat and system requirements are included: playR fetches them through its own service, with its own access to the databases of IGDB and HowLongToBeat.
All you have to do is run Fill in missing information from a game page, or the metadata sync from ⚙ Settings.
TV Mode
A full-screen interface designed for the controller and for couch distance: big cover art, carousels, a full game page, sorting and filters, all of it without a mouse.
- “What should I play tonight?” — in the ☰ menu: playR picks a game at random from whatever you are looking at (the current tab and filters). X launches it, A opens the game page, Y draws again, B closes. A game drawn recently does not come up again straight away.
- Screen saver — after a few minutes without touching anything, playR runs through the screenshots of your games full screen, music included. The first press on a key or on the controller brings you back exactly where you were. Adjustable in ⚙ Settings → Appearance (switch + delay from 3 to 15 minutes); on by default after 5 minutes.
- The screen saver never kicks in while a game is running, during a video, or with Settings open.
Wishlist & Deals
Your Steam and GOG wishlists in one place, with prices compared across Steam, GOG, Epic, Kinguin and some thirty other stores. The cheapest is highlighted, and the games you already own (or that are available through your Steam family sharing) are flagged.
A game that is not out yet shows a badge: Out today, Out tomorrow, Out in N d, or the date when it is more than a month away. On release day, playR tells you with a 🔔 notification — only for the games you were really waiting for, never for a title added after it was already out.
The GOG wishlist assumes that your GOG profile is public, just like for the library.
Your playR wishlist
Steam and GOG only know their own games. For everything else, playR has a list of its own:
- Search for the game in the search bar — the magnifying glass, in TV mode. It also finds what you do not own.
- Open its page and click the heart.
It lands in Wishlist & Deals with a purple R badge, and is treated there like all the rest: compared prices, release badge, deal alert. The same heart removes it.
Getting alerted when a game drops in price
playR can warn you as soon as a game on your wishlist goes past a given discount. The setting lives in ⚙ Settings → Region & prices, under “Wishlist deal alert”: pick the threshold above which you want to be warned (from -10 % to -75 %, -30 % by default), or “Off” to receive nothing at all. Do not forget to Save.
The alert lands in the 🔔 bell: « Game name is -45 % », with the price and the store concerned, and a “View deal” link that opens the game page directly.
The price announced is the one of the most discounted offer, which is not always the cheapest in absolute terms. Alerts show up in the normal interface; TV Mode has no bell, even though the setting is reachable there.
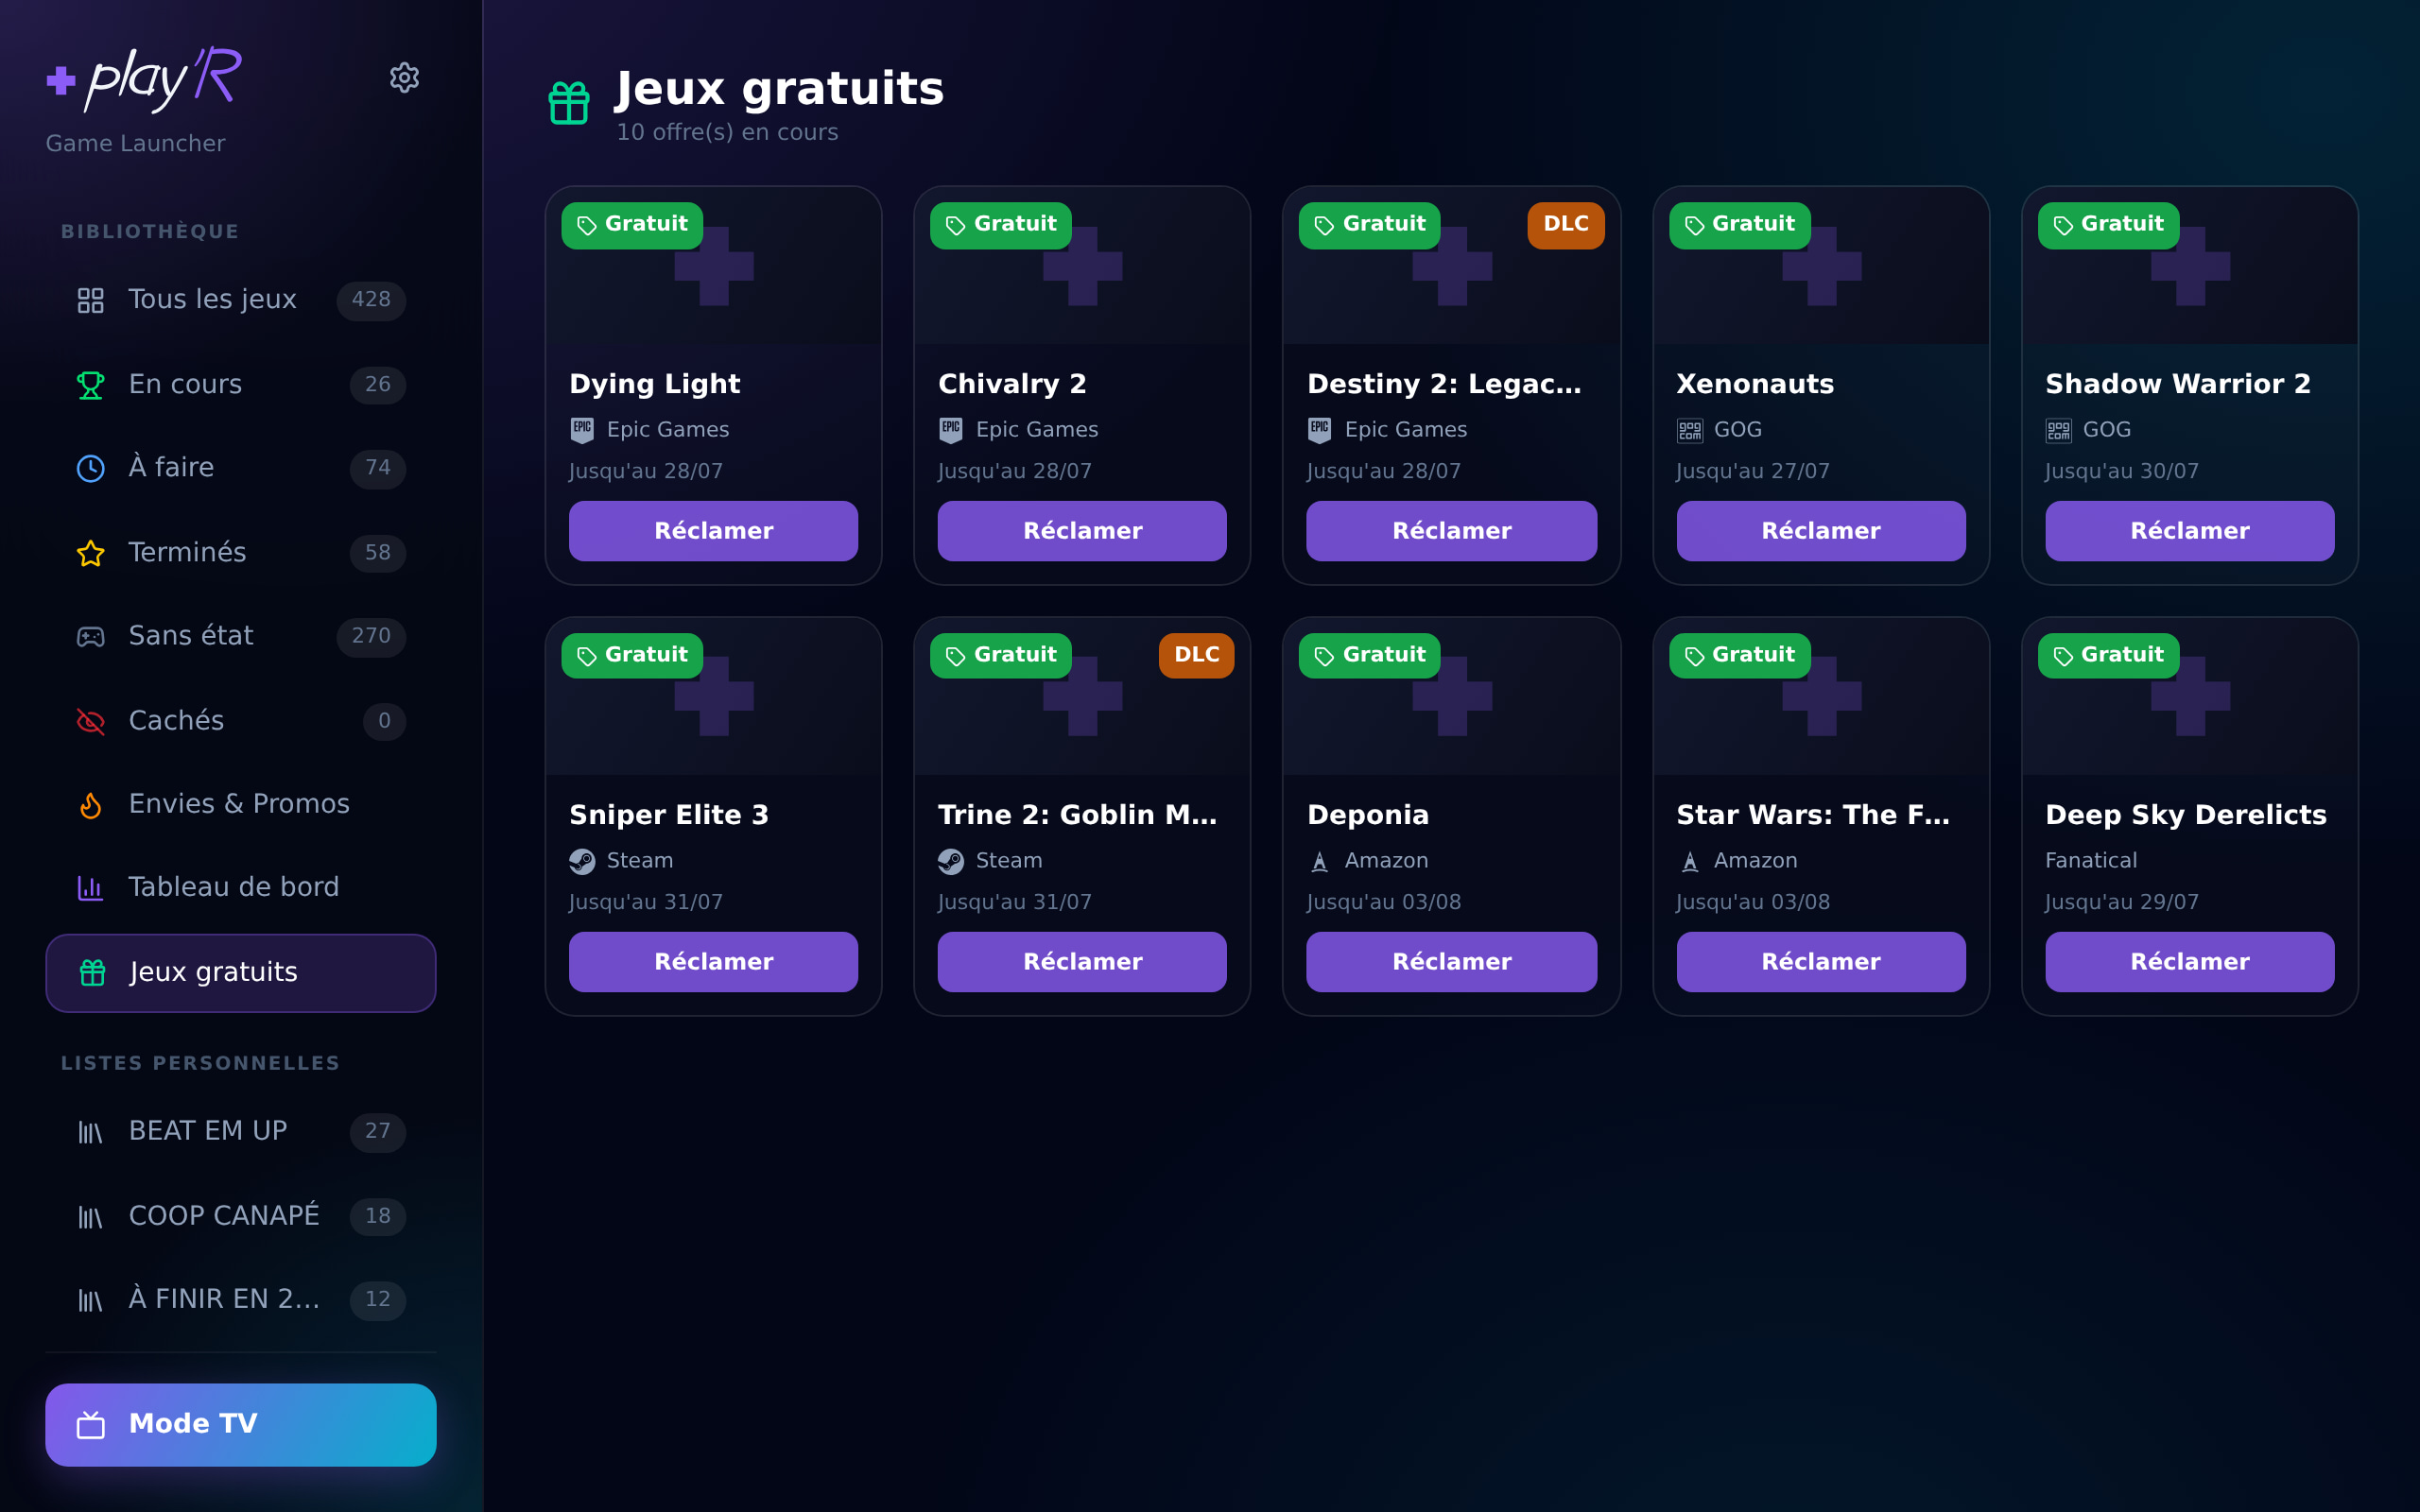
Free games to claim
The Free games entry in the sidebar: playR lists there the games currently given away (Epic, GOG and other stores), with the end date of the offer. A 🔔 notification tells you as soon as a new offer shows up.
- Games you already own are hidden — no point in seeing them.
- Any DLC is flagged with a badge, but stays visible.
- The Claim button opens the store in a playR window that keeps your session: sign in once to Epic or GOG, and the claims that follow go through without signing in again.
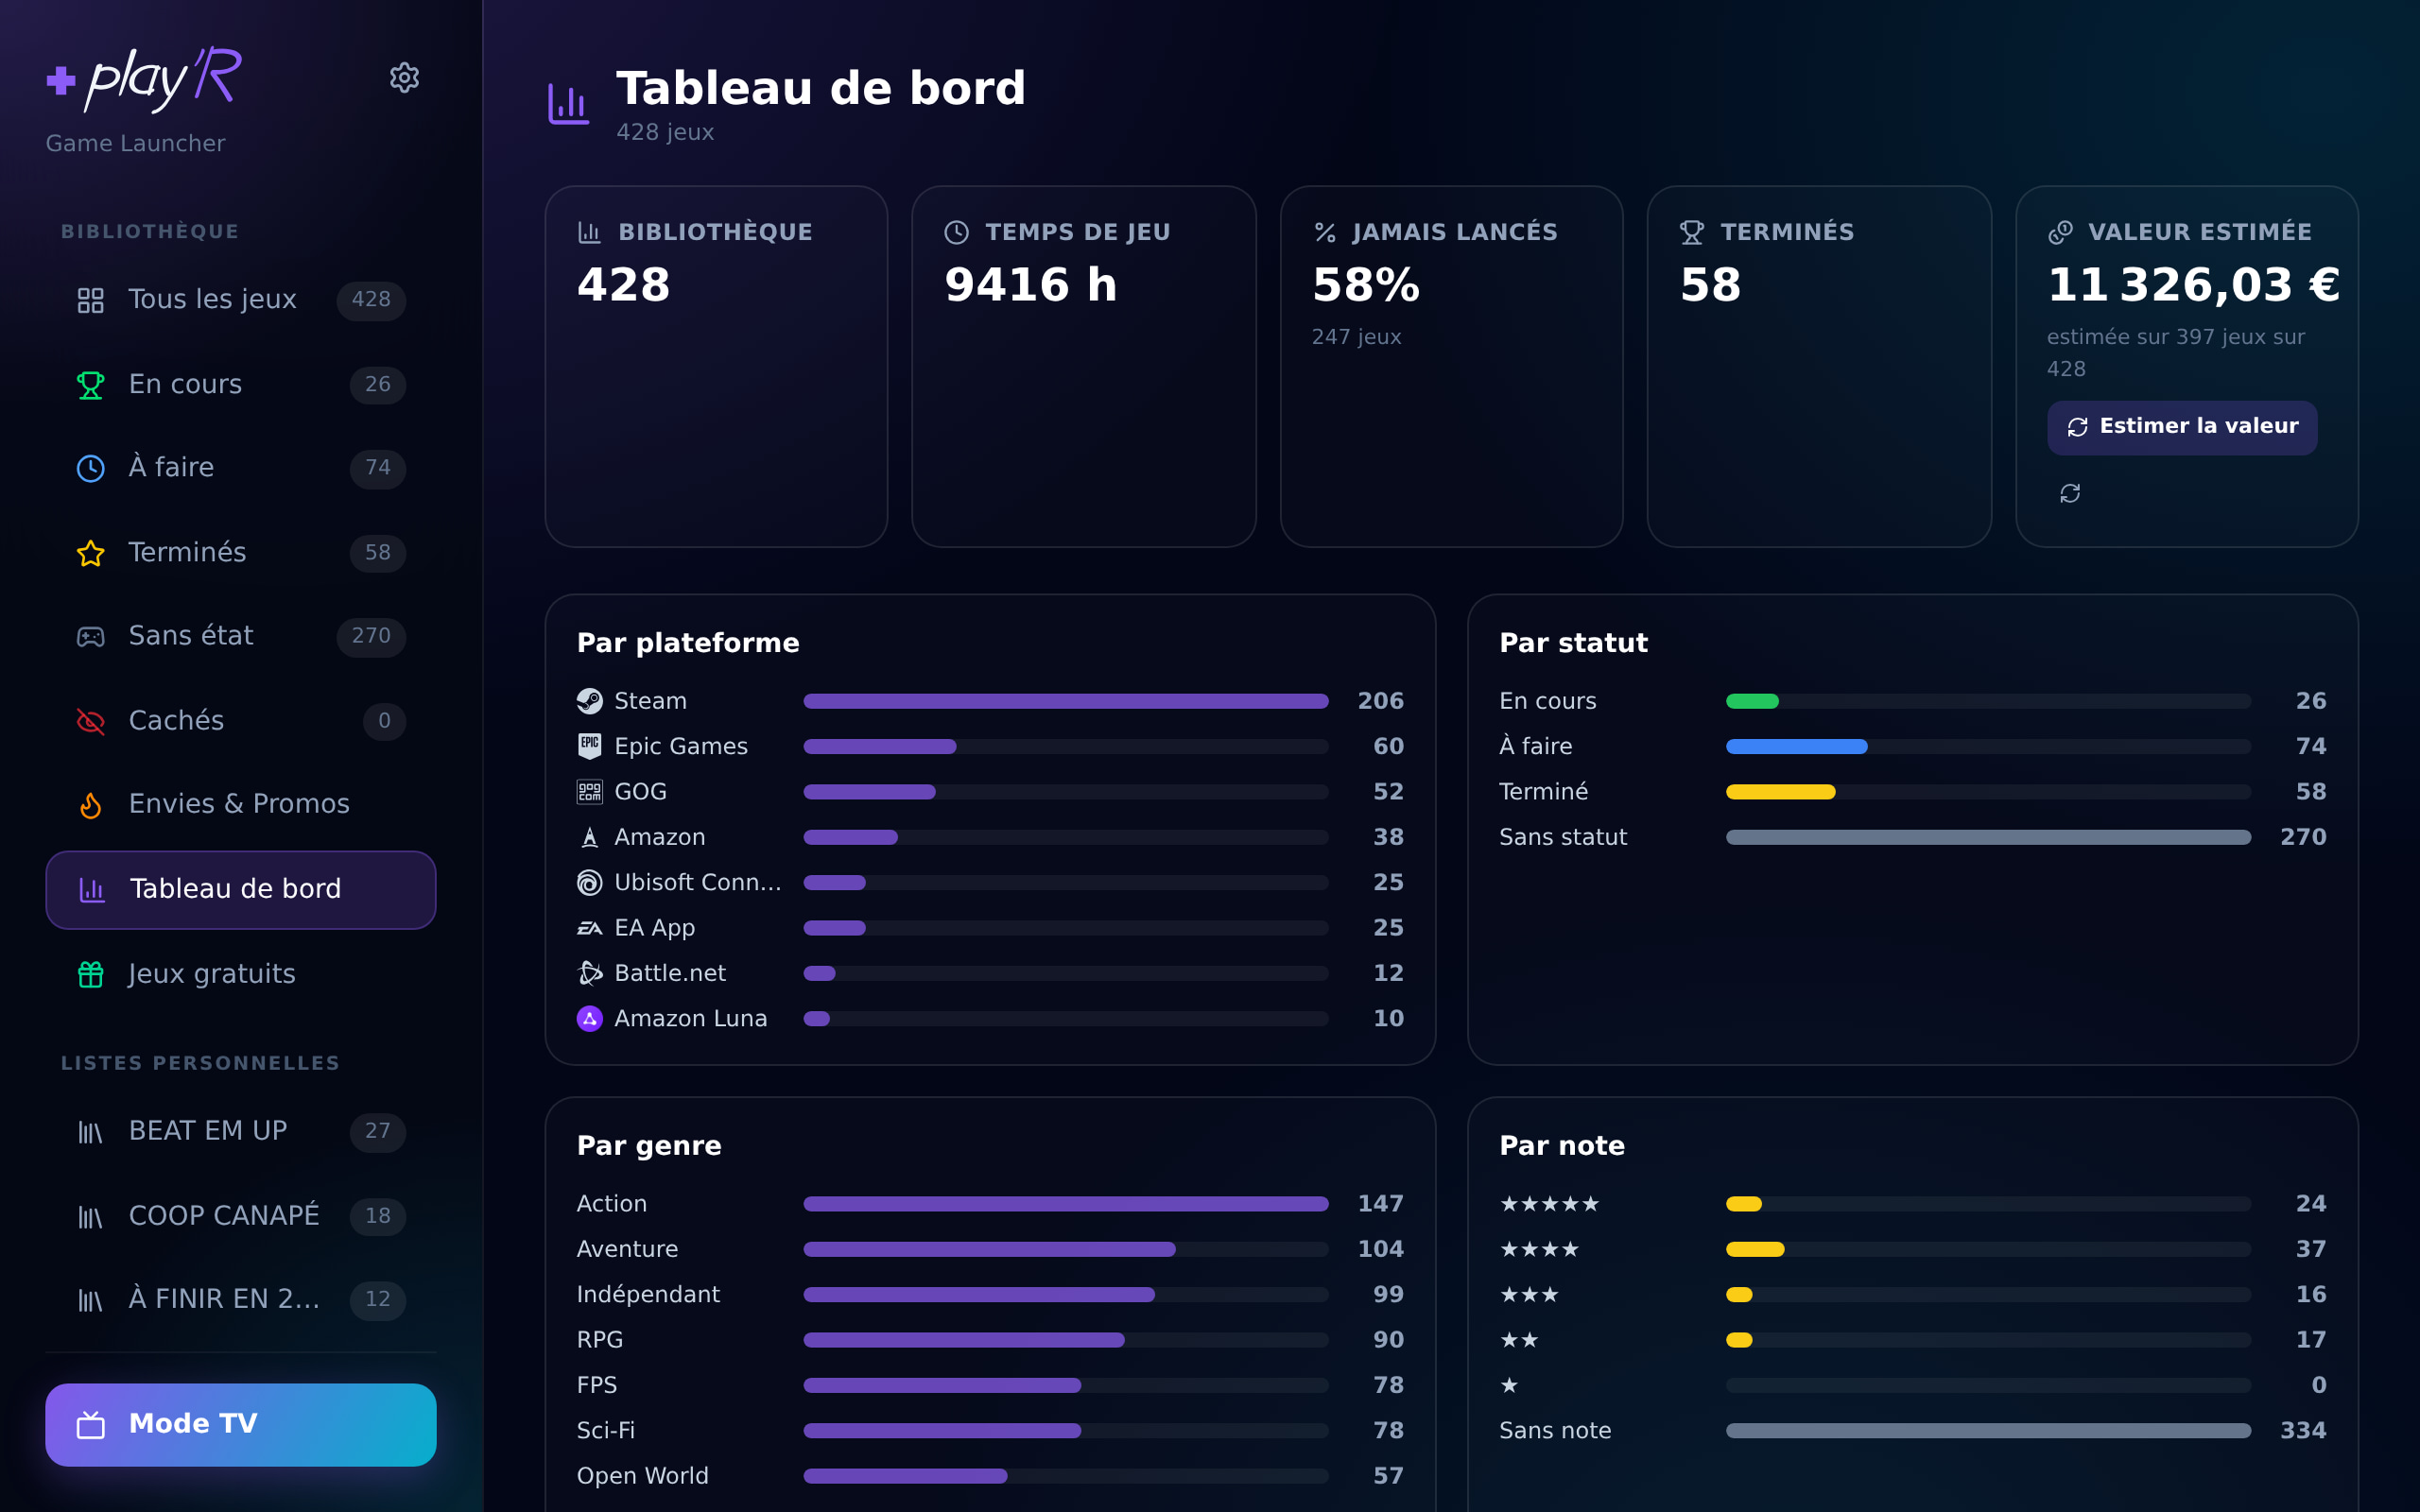
Dashboard
The Dashboard entry in the sidebar — an overview of what you really own:
- Five figures: library size, total play time, share of games never launched, completed games, and the estimated value of the collection.
- Six breakdowns: by platform, by status, by genre, by rating, by release year, and your most played games.
- The “Estimate value” button starts a background calculation: playR looks for the best current price of every game, across all stores. You can go on using the application while it runs; the progress is shown.
The statistics show up instantly, with no network. Only the value estimate needs a connection.
Change a cover
Some games have an ugly, generic or missing cover. From the game page: “Change the cover” → playR offers a grid of images taken from SteamGridDB, one click is enough. “Restore default” goes back to the original image.
There is also a bulk fill, which goes looking for a cover for every game that has none. It only fills in automatically the matches it considers certain — the rest is left to you to pick by hand.
Your choice survives syncs: a resync of the platform never replaces it.